Establishing and enhancing Literacy Foundations through Multi-Sensory Discovery Learning
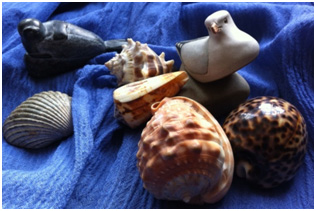
A seagull sitting on a stone
A seagull sitting on a stone surrounded with shells.
A seagull, sitting on a stone surrounded with shells, saw a seal.
A seagull, sitting on a stone surrounded with shells, saw a seal swimming in the sea.
A seagull, sitting on a stone surrounded with shells, saw a seal swimming sideways in the salty summer sea.
Processing Multi-sensory Information
From a very early age we are receiving, processing and integrating a wealth of multisensory information. The way we relate to this information determines our intellectual development and associated performance. Learning happens when we apply our conscious will to the reception and integration of the sensory information we gain through our association with other beings, situations, objects and structural things present in our surrounding environment.
Creativity is the gift of movement
Joy is the gift of love
Happiness is the gift of being present
Peace is the gift of calm contemplation
Gratitude is the gift of sharing
Devotion is the gift of life
Reverence is the gift of humility
Patience is the gift of time.
The literacy section is designed to support a combined range of age and ability with foundation literacy skills from a multi-sensory perspective that structures self-directed learning, fluency and confidence, through a broad spectrum of enriched understanding and encouragement.
Introduction to Foundations for Literacy
Multi-sensory letter foundations
Automated responses are learnt through active repetition whereas Rote learning is usually associated with correct verbal responses Rote learning can be associated with the predominance of early learning through active repetition motivated by a desire to imitate, as exactly as possible, another person’s activity. Multi-sensory learning could be considered to be more learner-directed than either automatic or imitative learning processes. Multisensory information may not in itself be easily understood for various reasons such as – inability to integrate a wide range of sensory information from one particular area of sensory perception. For example the sounds heard in one ear and the sound waves perceived in the left ear can vary according to the different position of each ear. In order to locate the cause of a sound our brain registers the vibrations received by each ear separately and then integrates this information in order to identify what sound is being made and form which direction. Similarly the brain interprets patterns of sound associated with speech and thereby learns to accommodate different accents and different tones of voice. E.g. consider the phrase ‘Yes dear!’. ‘Yes dear?’ could be a question of enquiry, or ‘Yes dear’ an offer of support or a special listening space; or ‘Yes dear’ it could be an explanation of agreement or confirmation. Simply hearing the spoken sounds and the intonation may be coordinated with visual information such as-
the speaker’s facial expression and body language;
the environmental geography in context of where, how, who and what elements related to the specific circumstance.
The integration of both auditory and visual information may also be associated with –
the listeners personal disposition and inner feelings;
the listeners conceptual understanding and comprehension skills;
Supportive kinaesthetic experience may include:-
the nature of eye contact and intimate physical contact;
kinaesthetic interaction with the environment;
the listener’s personal thoughts and inner motivation;
the listener’s recall of past experiences;
and the listeners own skills, talents and interest.
Thus multisensory integration of multisensory information may be anything from over whelming on one end of the spectrum, to richly informative and inspirational on the other end of the spectrum.
The questions of consideration discussed by the author are related to the early development of literacy and numeracy skills and invite adults to consider how well can we:-
- co-ordinated multisensory information
- scaffold learner directed learning with helpful sensory information
- support sensory integration,
- Facilitate discovery learning and self-correction.
Our base-ten system is fundamental to foundation numeracy (the four operations, add, subtract, multiplication and division). The phonetic structure within the English language supports foundation literacy (reading, writing and spelling ) skills. Our ability to discriminate auditory phonetic sounds within our spoken language is associated with visual letters and letter patterns. Thus our literacy skills are established as a specified extension of pre-reading and pre-writing auditory and visual perceptual skills.
Learning to read and write initially requires:
A shift from 3D visual skills related to a structural relationship with our environment to 2D visual skills that establish issues of orientation and linear left to right sequencing. .
Using our Kinaesthetic senses we can bridge the gap between our initial 3D sensory experiences and the later development of 2D symbolic forms of written intellectual presentation.
For example a child learning to count may learn to say the numbers in their correct numerical order before developing the ability to count objects. However, a young child who can count objects may not yet understand that nine objects remains nine objects no matter where they are placed, e.g. either in a row or as a collective bundle. In contrast to the understanding of the conservation of number the value of a written numbers changes according to orientation and sequential order: for example this is a 2 but this is and S and this is a 6 but this not a 6 when it is rotated into the position of a 9; the number 02 means nothing and two whereas 20 means twenty, similarly 63 is not the same number as 36. and the conceptual understanding any not Using creative activities initial learning can encourage awareness of Visual Orientation through Graphic design.
Letters that do not have a symmetrical shape must only be observed from the correct side and when working from a 3D perspective there needs to be a physical structure within the activity and structural design that inhibits observation from a reversed perspective. For example if one presents seven swans swimming along a stream the model must have a background that prevents observation from the reverse perspective which would present a backward S letter shape that looks like a number 2 rather than a letter S.
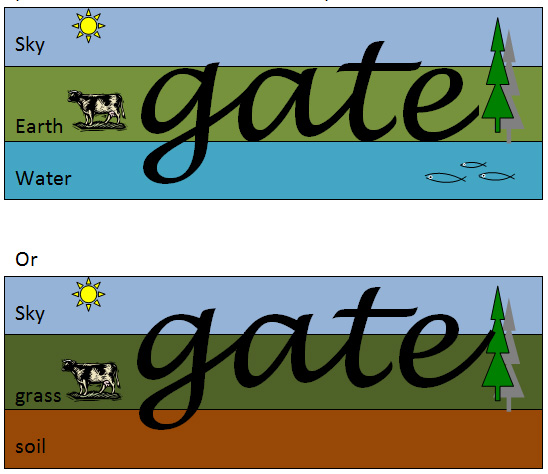
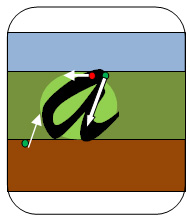
Similarly a lower case letter needs to be observed within a structure that clearly presents its position and height. This can easily be achieved if a recognised pictorial representation of position is standardised. For example:
| In the folder titled ‘Multi-sensory Alphabet Activities’ there are lists of ideas and creative activities that can enrich the association of visual letter shapes and phonic letter sounds through multi-sensory and kinaesthetic experience. |
The following illustrates a selection of ideas for each of the individual letters of the alphabet in both lower case and a capital format.
a – Place an apple next to an arrow then using fine sewing pins, pin a thread or thin chain onto the apple and then up and down the arrow to illustrate the course that is required when we write a lower case letter a
The initial letter sounds apple and arrow also represent the phonic letter sound.
- Cut an apple in half and print the round shape onto paper then cut out and stick or draw an arrow at the side of the apple going down wards. Finally draw with ones finger and/or a thick writing medium, the letter a over the printed picture following the correct cursive handwriting movement.
- When the apple prints are repeated in a line then the handwriting task can be to produce a consecutive line of joined letters.
- Using a large chain hold it up and then carefully lay it down in the same pattern of movement that would be used to write the cursive letter on paper. Laying the chain onto a level tray of sand is ideal and invites the participant to repeat this handwriting movement using a finger or a stick to then draw the letter in the sand.
A
- Construct the capital letter shape using sticks, the old fashioned flat lolly sticks are ideal.
- Use strips of coloured paper or sticky paper or coloured sellotape to produce the letter A on a suitable surface. (the author has a sticky tape of heart shapes to use for constructing the letter H. Coloured sticky tapes and tapes with other designs can also be useful; such as the Union Jack, Holly or Snowmen etc. sold for special occasions!
| The full set of capital letter building shapes are presented in the Alphabet file called ‘Capital Letter Building’ with Layered shapes. |
- The shapes below are the ones used to build the capital letter A. The author has laminated the following shapes so that they can be placed one on top of the other in a specific order to create a capital letter A. When the shapes are given in a random order this puzzle can be notably challenging
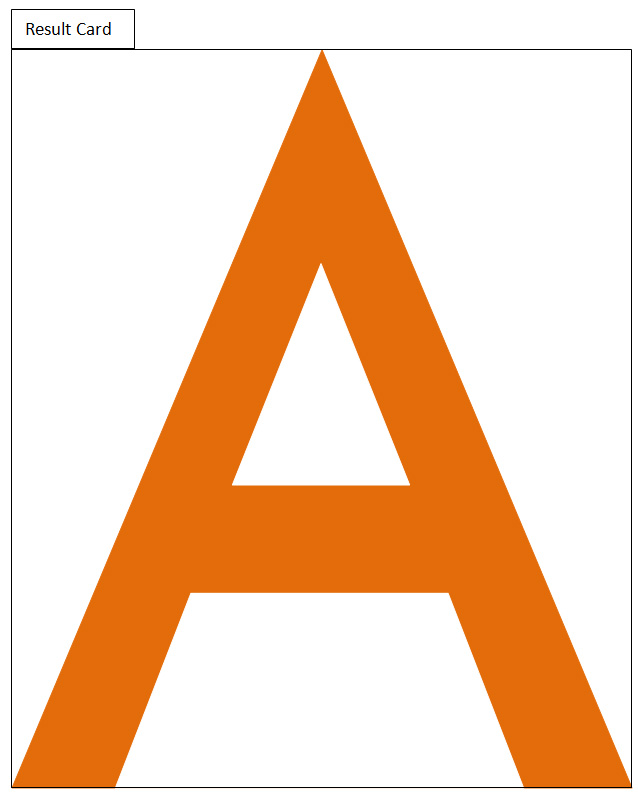
Using the white and orange triangles the challenge is to sequence and position the triangles in a way that will create the capital letter shape shown above.
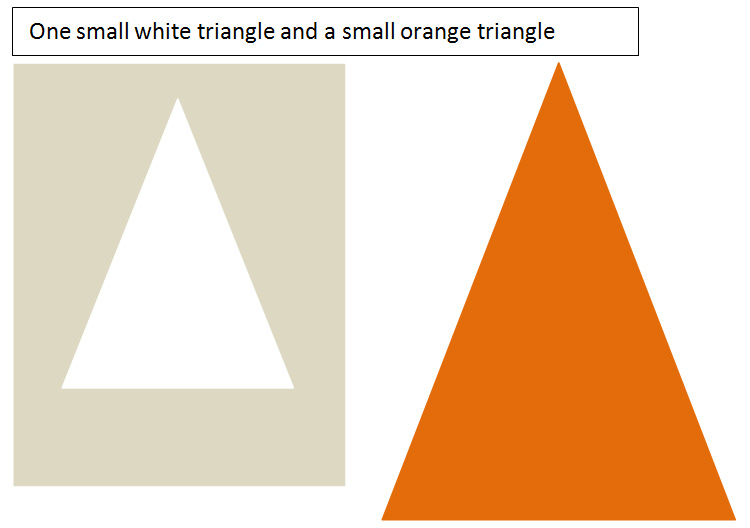
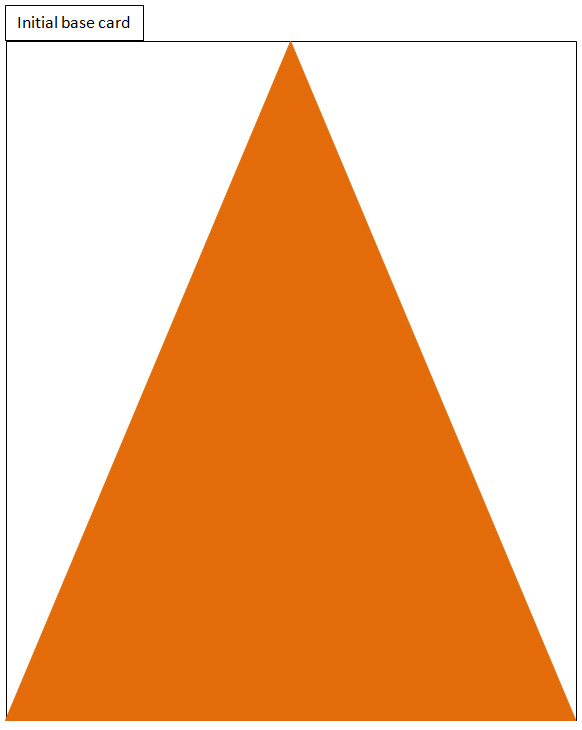
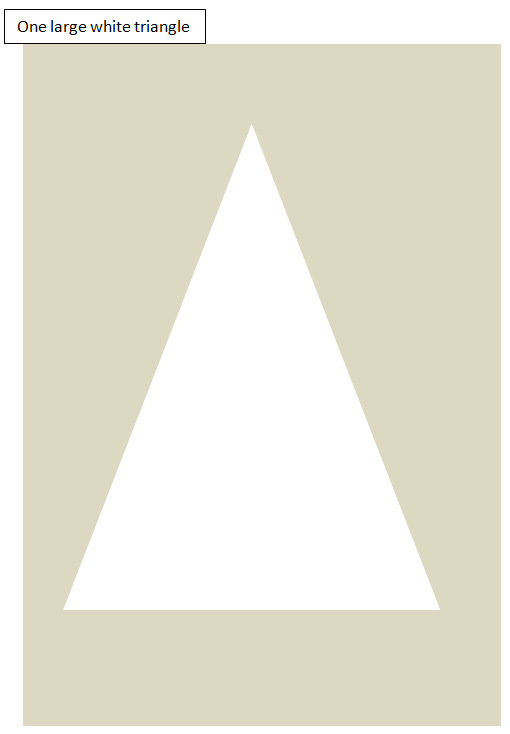
Unfortunately this capital A shape puzzle is one of the more difficult capital letter shapes to master, however, once this challenge is mastered the illustrated technique will inspire success with following letter puzzles. Some of the other capital letter shapes are also a little challenging but many of which are especially easy in comparison to this letter A.
This unique approach to constructing capital letters A through to Z are presented in full as a set of designs for printing and laminating in the literacy folder for Teaching Materials under the file name [Capital Letters- Layered Shape Puzzles A-Z]. Helena often uses this kit initially for the construction of just the first letter of a pupil’s name. This often gives the opportunity for the pupil to construct an easier letter as a first experience. It also reinforces the use of capital letters at the beginning of a name and can go on to constructing the pupils full set of Initials. For some pupils I have ventured into creating their first name in full as capital letters or when working with the lowercase cursive letter shape kit [presented in full in the file called for the construction of the other letters following the initial capital letter in their first name or even their first and surname in full.
B
- Black, blue and brown buttons or broaches can be fixed on to a piece of material or placed onto sand or a rolled out pancake of clay to illustrate the lower case b and capital B. Also the consonant blends can be illustrated e.g. blue berries or blackberries on a plate illustrating
- Outside a collection of brown play bricks or real bricks can be set out into the respective letter shapes.
- A collection of bats and balls can also be used to create a picture of the letter shape. A length of string may then be glued onto the 3D picture to illustrate the written letter shape.
- Black, blue and brown balloons of the appropriate round and long thin shapes can be used to illustrate the written b and/or B
- Thread Black, blue and brown beads and use a long string of beads to illustrate the written b and/or B * illustration

- Make bread buns or butter biscuits in the shape of the letter.
- Roll out a long length of blue, black and/or brown plastacine into the respective consonant blend.
- Press dried butter beans or wooden beads onto a flat surface of clay or sand inorder to make the lowercase or capital letter B shapes.
C
- Create an incomplete circular shape of candles and light in the same direction as one would write a capital letter C.
- Place Copper coins or circles of carrot in sand or on a flat surface placing them one after the other in the same direction as one would write this letter.
D
- Use sticky dots or make dots on a sand tray in the letter shape as it would be written.
E
- Use eggs (hard boiled if necessary!) to illustrate the letter shape, placing them in/on sand.
- Glue or staple a length of sewing elastic on to card.
- Make up a chained length of elastic bands and glue onto card.
F
- Use feathers or fur fabric.
G
- Glue gold glitter for g and green glitter for gl onto paper or card.
H
- Hearts
- Punch holes with a hole punch into a piece of card or stiff paper the base card may need to be shaped like this:
The base for the capital H may need
to be folded in order to gain access
to punching the holes across the centre.
- Cut hazel sticks and make them into large freestanding h structures. Note that the lower case h must only be viewed from the correct side if it is to be illustrated in the correct left to right perspective therefore any lowercase h structures will need to be situated in front of a backing/background that prevents observation from the wrong side.
I
- Paint this letter onto a plate some healthy ice-cream to eat afterwards.
J
- Spoon or finger paint the letter shape with jam on to a suitable (preferably edible – bread or biscuit) surface.
K
- Draw colourful kite shaped kites and mount onto a sky background in the formation of a letter K.
L
- Peel a lemon and cut the peel into squares or strips then mount into L letter shapes.
- Stick lilac lace on to card to make an L shape lilac lace letter.
M
- Make your own mud from clay then draw M letters with the mud. Remember repeat and then read sentences could be:-Mucking about in the mud makes us messy! More mud makes more mess!
N
- Use giant nails to lay out in the capital letter N shape. Nail a row of nails that have large easy to hit heads into a piece of soft wood or balsa wood.
O
Make a circle of thick glue on a piece of card and then sprinkle with oats to make an oat capital O. Use half an orange to make prints and then draw a bold line around the shape to represent an O. Be sure to start and finish the letter O from the top and then try making a line of prints and then use them to scaffold a row of joined cursive handwriting 
P
- Press/push pink and/or purple pegs into deep sand so the letter shape is illustrated
- Colour a picture of pretty Polly parrot or a princess in pretty pink and purple pyjamas onto a postcard and post it to someone whose name begins with P.
- Using a piece of pipe for the straight line and half a potato make a 3D representation of the letter P shape, then, using a straight length of pipe and half of a potato make P shaped prints.
Q
- Question marks or even a series of questions. A simple question game can be created by presenting a picture and then asking simple ‘What colour…….’? How many….? Simple questions that have either a yes or a no answer e.g. ‘Is the bucket black?’ place an added emphasis on the creation of a question rather than a focus upon how to present the answer. If questions are also a good option for example if Jane bought two apples and her brother also bought an apple how many apples did they buy. This example is easily presented with apples as props and thereby finding the right answer becomes a visual task of comprehension rather than a task of language recall and comprehension.
R
- Use ruby red rose petals or red ribbon to construct the r/R letter shapes on a card base.
S
- Glue silver sequins to illustrate the s letter shape.
- Stamp/skip the s letter shape. (Ideally this would be done on a large flat sandpit or better still on a large sandy beach.
- Draw/paint/model six silver snakes/swans
- Make the consonant blend st letter shapes with stones or sticky backed stars.
T
- Use turquoise tinsel to construct the lowercase t shape letter.
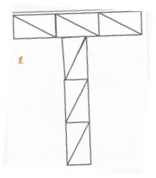
- Use a collection of identical right-angle triangle shapes or sticky back paper triangles to construct a capital T shape.
U
- Use one or two upside down umbrella to construct the U letter shape. Cover or remove the handle so that the U letter shape is not disturbed.

- Colour the flag design presented on the British union jack flag.
- Make a display of upside down objects.
- Tell a fairy story about a unicorn.
V
- Make up a collection of different shaped vases and match them to symbol shapes that present the overall shape of each individual vase. When you find a ‘v’ shaped vase outline the letter ‘V’ shape on the outside as a painted letter V. Create the v shaped letter on a card background using violet coloured velvet material.
- Sew a V letter-shape with two strips of velcro onto thin card or material held flat in a frame or embroidery hoop. Then the top layer of the Velcro stripes can be pulled off and replaced as an active experience of the V letter shape.
W
- Use white wool stuck on card or sewn onto card or material to make the W letter shape.
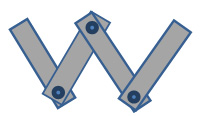
- Use strips of card or Balsa wood to make the W shape. If each of the joins is pinned the W can be made to walk.
X Sew crosses on to card or material held flat on an embroidery ring. Create a cross shape in cross stitch on Binca material.
Y
- Draw yellow y’s using the yoke of an egg.
- Find the Y shape on sticks or twigs or living tree branches.
Z
- Use a heavy zip (from a bag or an old tent) to construct a working zip that illustrates, when done up, the correct sequence of movements that will make the Z letter shape. I.e.

- Draw a z letter shape using zigzag on a sewing machine. Try to draw a Z letter shape using a zigzag line. Or draw straight zig zag lines and cut them out and then stick the on to paper as a Z letter shape.
